
VenueGrade terminal
Setup and User Guide
Every step from unboxing the terminal to the first rating landing in your panel. No technical knowledge required.
What’s in the Box
Check that everything is there before you start
- 01
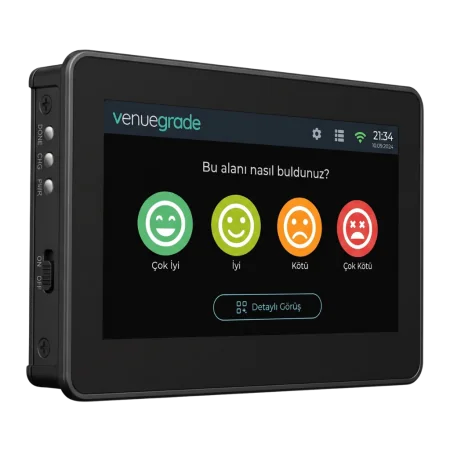 VenueGrade terminal4.3-inch touchscreen; serial number on the rear label
 - 02
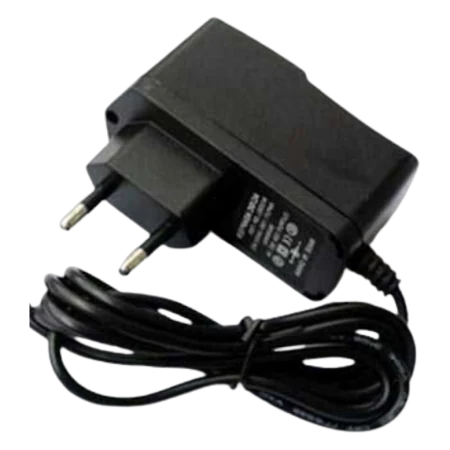 12 V 1 A power adapterIts leads connect to the terminal’s power terminal block; the adapter plugs into the mains
 - 03
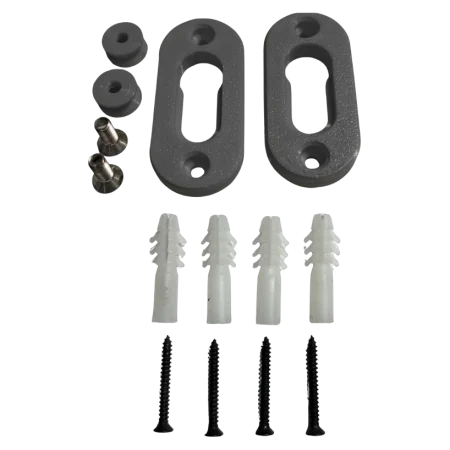 Wall mounting kit2 hanger pins, 2 pin brackets, 2 pin screws, 4 wall plugs, 4 wall plug screws
 - 04
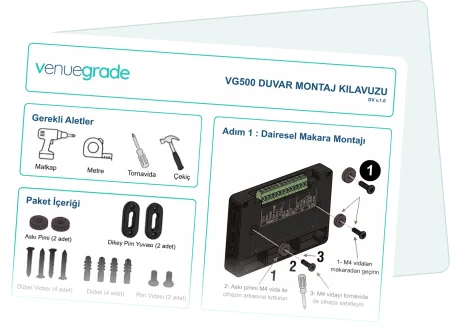 Mounting guideMounting steps; its QR code opens this guide
 - 05If ordered
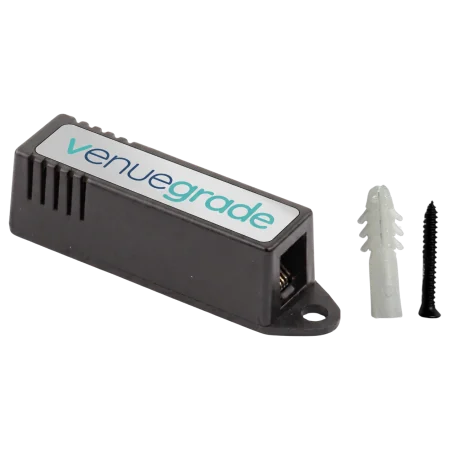 Sensor moduleMeasures temperature, humidity, air pressure, air quality and vibration; with 1 wall plug and 1 screw
 - 06If ordered
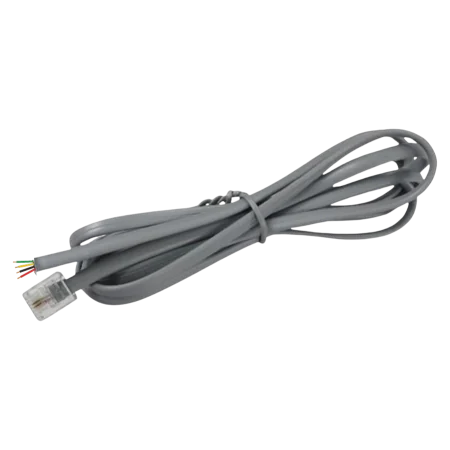 Sensor connection cablePlug end to the sensor, bare wires to the terminal block
It is printed on the label on the back of the terminal, in the form VG-XXXXXX (for example VG-3A7F12).
You can also read it on the screen in two places: tap the list icon in the top bar (Staff Login → the “Serial:” line), or tap the gear icon (it is shown above the PIN pad).
You will be asked for this number at every stage of setup and in any support request.
Installing the Device
Takes about 10 minutes
2.1 Placement
- Mount the terminal at the exit of the zone, about 140 cm above the floor.
- Pick a spot visitors can easily see and reach on their way out.
- Avoid direct sunlight and places exposed to splashing water.
- Make sure the wireless signal reaches that spot — you can check the signal strength with your phone.
- Make sure there is a mains socket within reach of the adapter; the device runs on 12 V 1 A.
2.2 First Power-On
- 1Wire the power adapter to the terminal block
Screw the adapter leads into the terminal block on the back of the terminal, minding the polarity (+ and −), then plug the adapter into the mains. The device starts up within 15–20 seconds.
- 2Wait for the start-up screen
First the VenueGrade logo appears, then the rating screen.
- 3Check the screen
The top bar shows the clock and connection icons, the centre shows the question and four faces, and the version number sits in the bottom right.
Because the terminal is already mounted inside the zone, the visitor screen shows only the question and the rating options. The zone is recorded in the panel and in reports; you define it when you register the device.
2.3 Joining the WiFi
- 1Tap the WiFi icon in the top bar
The lock screen opens.
- 2Enter the PIN
The PIN is 6 digits and unique to each device; it is shown on the device card in the panel. If you do not have panel access yet, give us the serial number and support can provide it.
- 3Pick your network
The device scans for nearby networks on its own. Select yours from the list, enter the password and connect.
- 4Verify the connection
The WiFi icon changes colour and the clock appears in the top bar. The device announces itself to the panel and shows up as online within a few minutes.
Even after a power cut or a shutdown, the device rejoins the same network by itself when it comes back on. The password is stored on the device and never shown on screen again.
Re-enter the network password — mind upper and lower case.
The device only joins 2.4 GHz networks. If yours broadcasts on 5 GHz only, enable the 2.4 GHz band on your router.
Guest networks often block device-to-device access; prefer the corporate network.
Make sure the serial number is registered in the panel — an unregistered device cannot connect.
If the problem persists, unplug the device and plug it back in after 10 seconds.
The device gets its time from the internet and keeps it in an on-board clock module. A device that has never been online has no time set, so record timestamps may be missing. The clock corrects itself on the first connection.
Signing In to the Panel
From your computer, in a browser
The management panel and the staff mobile app are being readied for launch. This section describes the steps you will follow once they are live. Your terminal works in the meantime: ratings accumulate on the device and are uploaded once the panel is up.
- 1Go to venuegrade.com and sign in
Works in Chrome, Safari, Edge and Firefox — nothing to install.
- 2Sign in with your username and password
These credentials are issued by VenueGrade.
- 3Open the Devices section from the left menu
3.1 Registering the Device (Pairing)
The terminal cannot connect until its serial number is registered in the panel. Follow the order below.
- 1Add a new device
Enter the terminal’s serial number (VG-XXXXXX).
- 2Name the zone
For example “Level 2 – Ladies’ WC”. The name appears in the panel and in reports, not on the terminal screen.
- 3Fill in branch and location
For multi-site operations, reports are broken down by these fields.
- 4Save
Within a few minutes the terminal is listed as online and that zone’s ratings start flowing into the panel.
3.2 Screen Settings
Every element on the terminal is managed from the panel — you never have to touch the device. Changes reach the screen on the device’s next check-in, within a few minutes.
| Setting | What it does |
|---|---|
| Question text | Default: “How was this area?” |
| Rating options | The names of the four options and which of them appear |
| QR card | The “Detailed Feedback” QR code with its title and description |
| Request Cleaning button | Lets visitors open a request — off by default |
| Cleaned button | Lets staff confirm from the screen — off by default |
When you disable an option it disappears from the screen, but ratings already given with it stay exactly as they were in reports.
What the Visitor Does
No app download needed
- On the way out they tap one of the four faces on screen: Very Bad · Bad · Good · Very Good. A short “Thank you! Your vote is saved” message appears.
- To leave a detailed comment they scan the “Detailed Feedback” QR code with their phone. The screen shows a three-step prompt: open the camera, scan the code, leave feedback.
- If the “Request Cleaning” button is enabled they can raise a request directly. A “Cleaning requested” bar appears on screen, the zone is flagged in the panel and staff are notified.
It refreshes continuously for security — a photo of the screen cannot be reused elsewhere. A code older than roughly three minutes reports “expired”; simply scan the current one on screen.
What the Staff Member Does
5.1 Confirming from the terminal
If the “Cleaned” button is enabled in the panel, staff tap it after cleaning. Then:
- any warning bar (“Cleaning requested” / “Cleaning is due”) clears,
- the “Last cleaned” line on the Staff Login screen updates with date, time and staff name,
- and if a request was open, the response time is recorded automatically.
5.2 Confirming by QR code (mobile app)
- 1Tap the list icon in the top bar
The Staff Login screen opens: the date, time and staff member of the last cleaning at the top, the QR code in the middle, the serial number and a verification code below. This screen does not ask for a PIN.
- 2Open the mobile app and scan the code
- 3Tick the checklist
Optionally add before/after photos and a note: missing supplies, a fault and so on.
- 4Finish
The record reaches the panel immediately and the “Last cleaned” line on the Staff Login screen updates.
Staff accounts are created only in the management panel. To add a new staff member, create the user in the panel and grant access to the relevant devices.
Device Settings
Gear icon in the top bar → PIN → Settings
| Setting | Description |
|---|---|
| Brightness | Adjustable between 15% and 100% |
| Theme | Light / Dark — the device restarts on change |
| Language | Turkish / English / German — the device restarts on change |
| Update clock | Fetches the time from the internet again |
| Restart | Power-cycles the device; settings are kept |
| Factory reset | Erases all settings and any records still waiting to upload — including WiFi credentials and panel pairing. The device must be set up again. |
The question text and which sections appear on screen are set in the management panel, not here (Section 3.2).
Software Updates
The device updates itself — nothing for you to do
- A progress bar appears on screen during the update, then the device restarts.
- The device verifies the update package signature before installing; a corrupt or incomplete package is rejected.
- If anything goes wrong afterwards the device rolls back to the previous version on its own — no site visit, no cable.
- The installed version is shown in the bottom-right corner of the main screen.
Common Situations
Check here before calling support
| Situation | What to do |
|---|---|
| The screen will not turn on | Check that the terminal screws are tight, the polarity (+/−) is correct and the adapter is fully seated in the socket. Try a different socket. |
| The screen lights up but shows nothing | Unplug the device and plug it back in after 10 seconds. If it persists, call support. |
| It shows as “offline” in the panel | Check the WiFi icon in the top bar. If it is not connected, repeat Section 2.3. |
| The device does not appear in the panel at all | Verify the serial number is registered in the panel — an unregistered device cannot connect. |
| The clock is wrong | The device corrects its clock once it is online. Check the connection. |
| The QR code says “expired” | The code refreshes continuously for security. Scan the current one on screen. |
| The PIN is rejected | The PIN is device-specific and shown on the device card in the panel. Make sure you are using the right device’s PIN. |
| The “Request Cleaning” button is missing | That button is off by default; enable it in the panel (Section 3.2). |
| Ratings are not reaching the panel | During an outage ratings queue on the device and are sent in a batch once the link is back. The queue covers outages lasting hours; on a long one, restore the connection promptly. |
Support
Get in touch whenever you are stuck
| Channel | Details |
|---|---|
| Phone | +90 850 466 46 64 |
| info@venuegrade.com | |
| Working hours | Monday–Friday 09:00–17:00 (GMT+3) |
Quoting the device serial number (VG-XXXXXX) in your support request speeds things up.